Introduction
In the last blog post I tried to give few ideas when teams are pressing with just one player and are basically dropping deep with 9 players. We saw that it is very hard to find space on sides and that center backs should try to create numerical advantage by pushing higher-up the pitch. In this blog post, we will see how things change when 2 opposition players press high and what are our options there.
Situation II: Two opposition strikers press
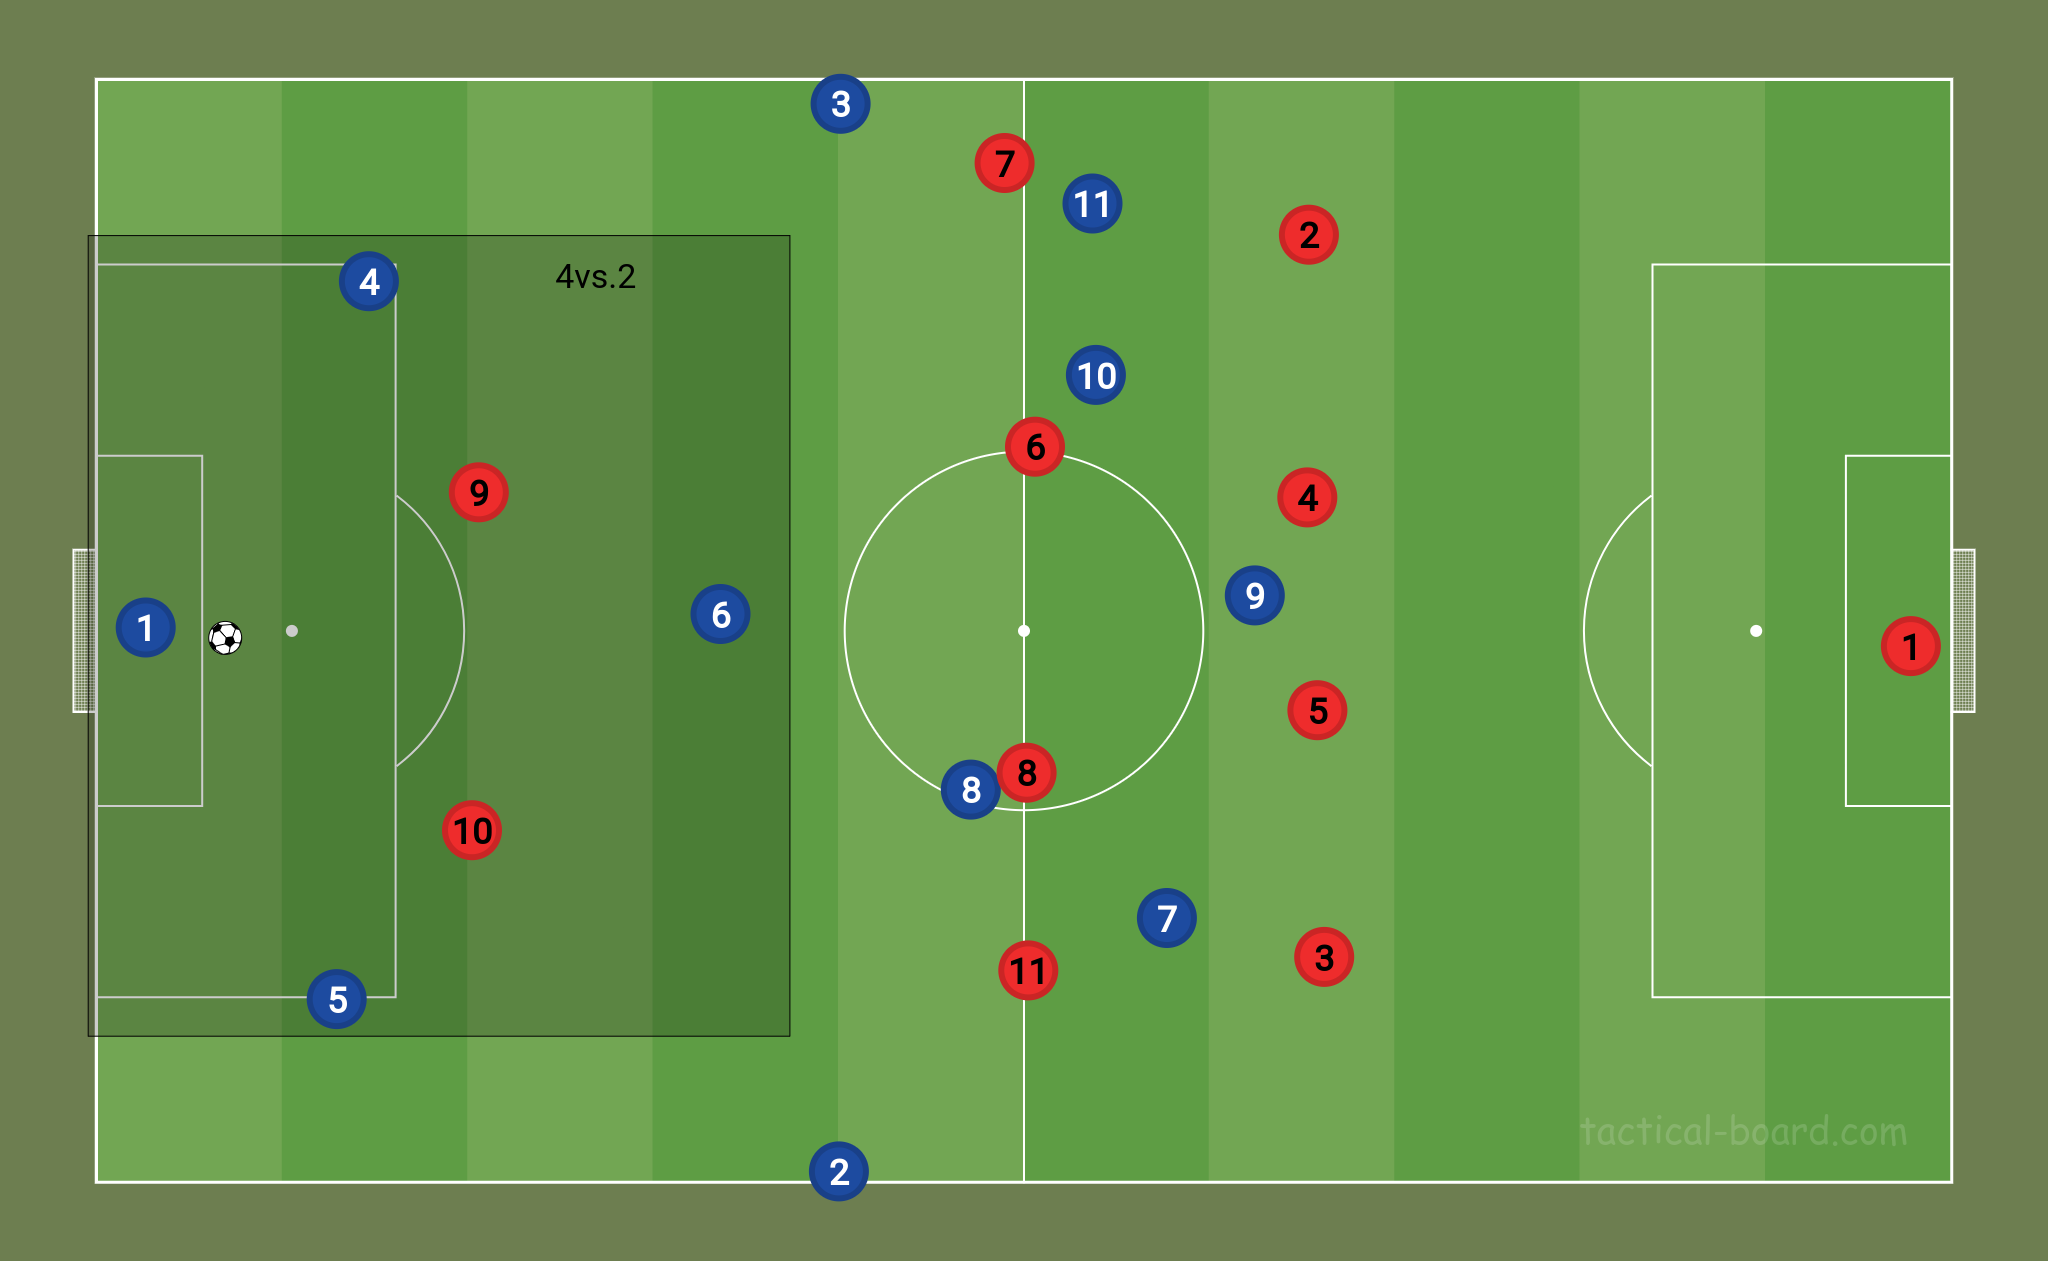
In this situation, we assume that two opposite strikers are pressing aggressively very high up the pitch while the rest of the team stays compact in the low block and are performing man marking. Since 2 strikers are going very aggressively on GK and 2 CBs, we want one of our DMs to drop back and offer himself as an option between two strikers. It is important that only one DM drops back while other 2 midfielders push higher-up the pitch in order to create space and block passing channels. In this way, we create 4vs.2 in the 1st zone which is very hard to defend by only 2 players.
 Diagram I: We seek for creation 4vs.2 in the 1st zone. One DM drops low while other two CMs push higher in order to create space. Full-backs push higher and can offer themselves as an option in circulation but it is very hard to break through on sides since opposition has there 2 players.
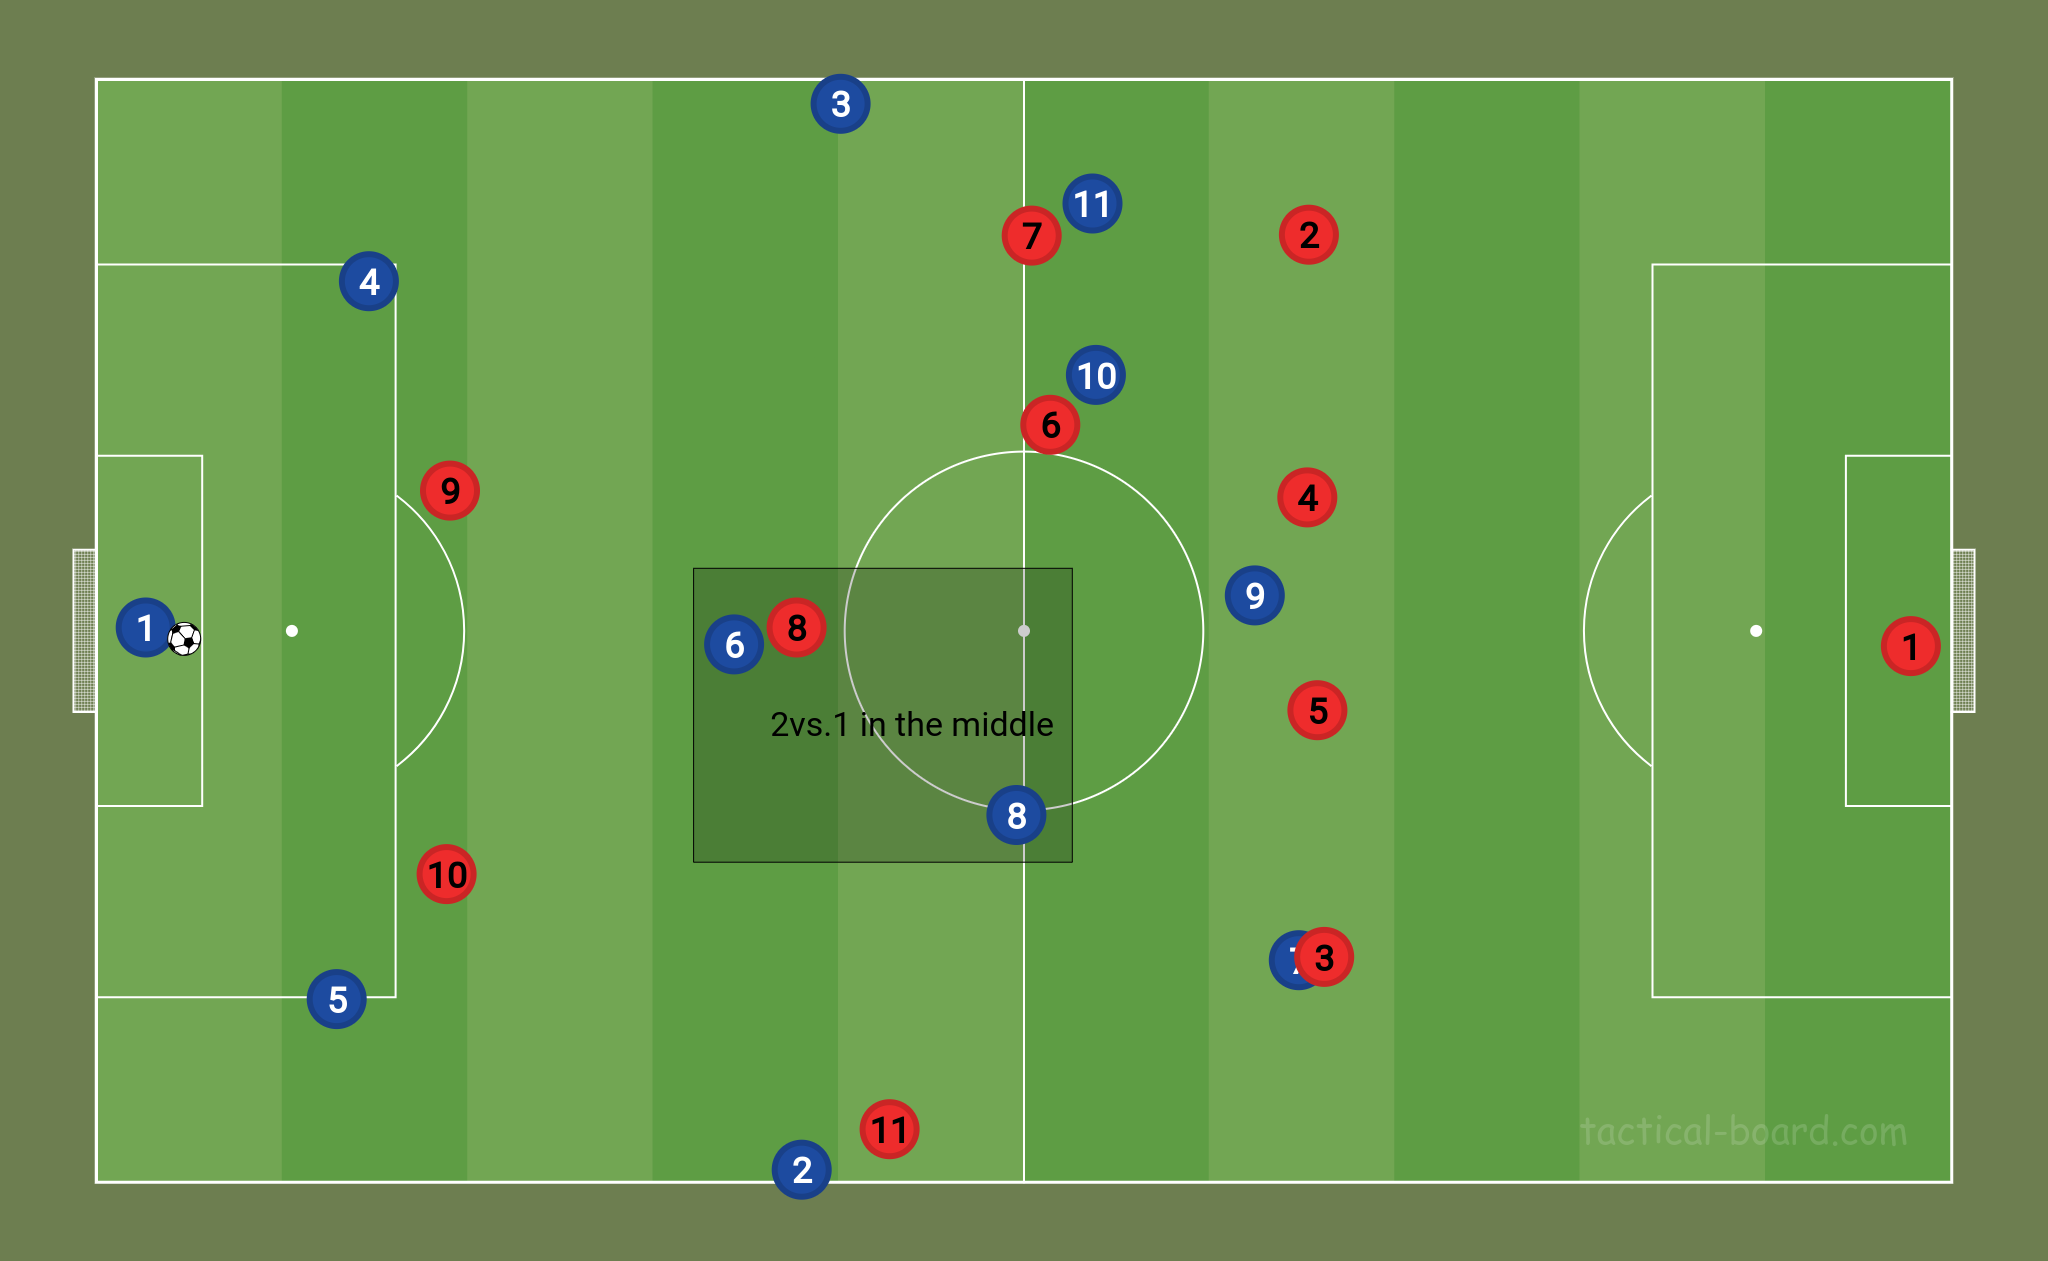
What will usually happen is that there will be an opposition midfield player who will aggressively track our DM, creating the situation as shown in the diagram below. Two situation can then happen. Either one of our midfield players will stay completely alone and we must try to pass him the ball (shown in diagram II).
 Diagram II: Opposition’s midfield player (#8) aggressively tracks our DM. (#6) Opposition’s LM (#11) stayed tight on our RB (#2) which left our #8 completely alone in 2vs.1 situation in the midfield which we should try to exploit.
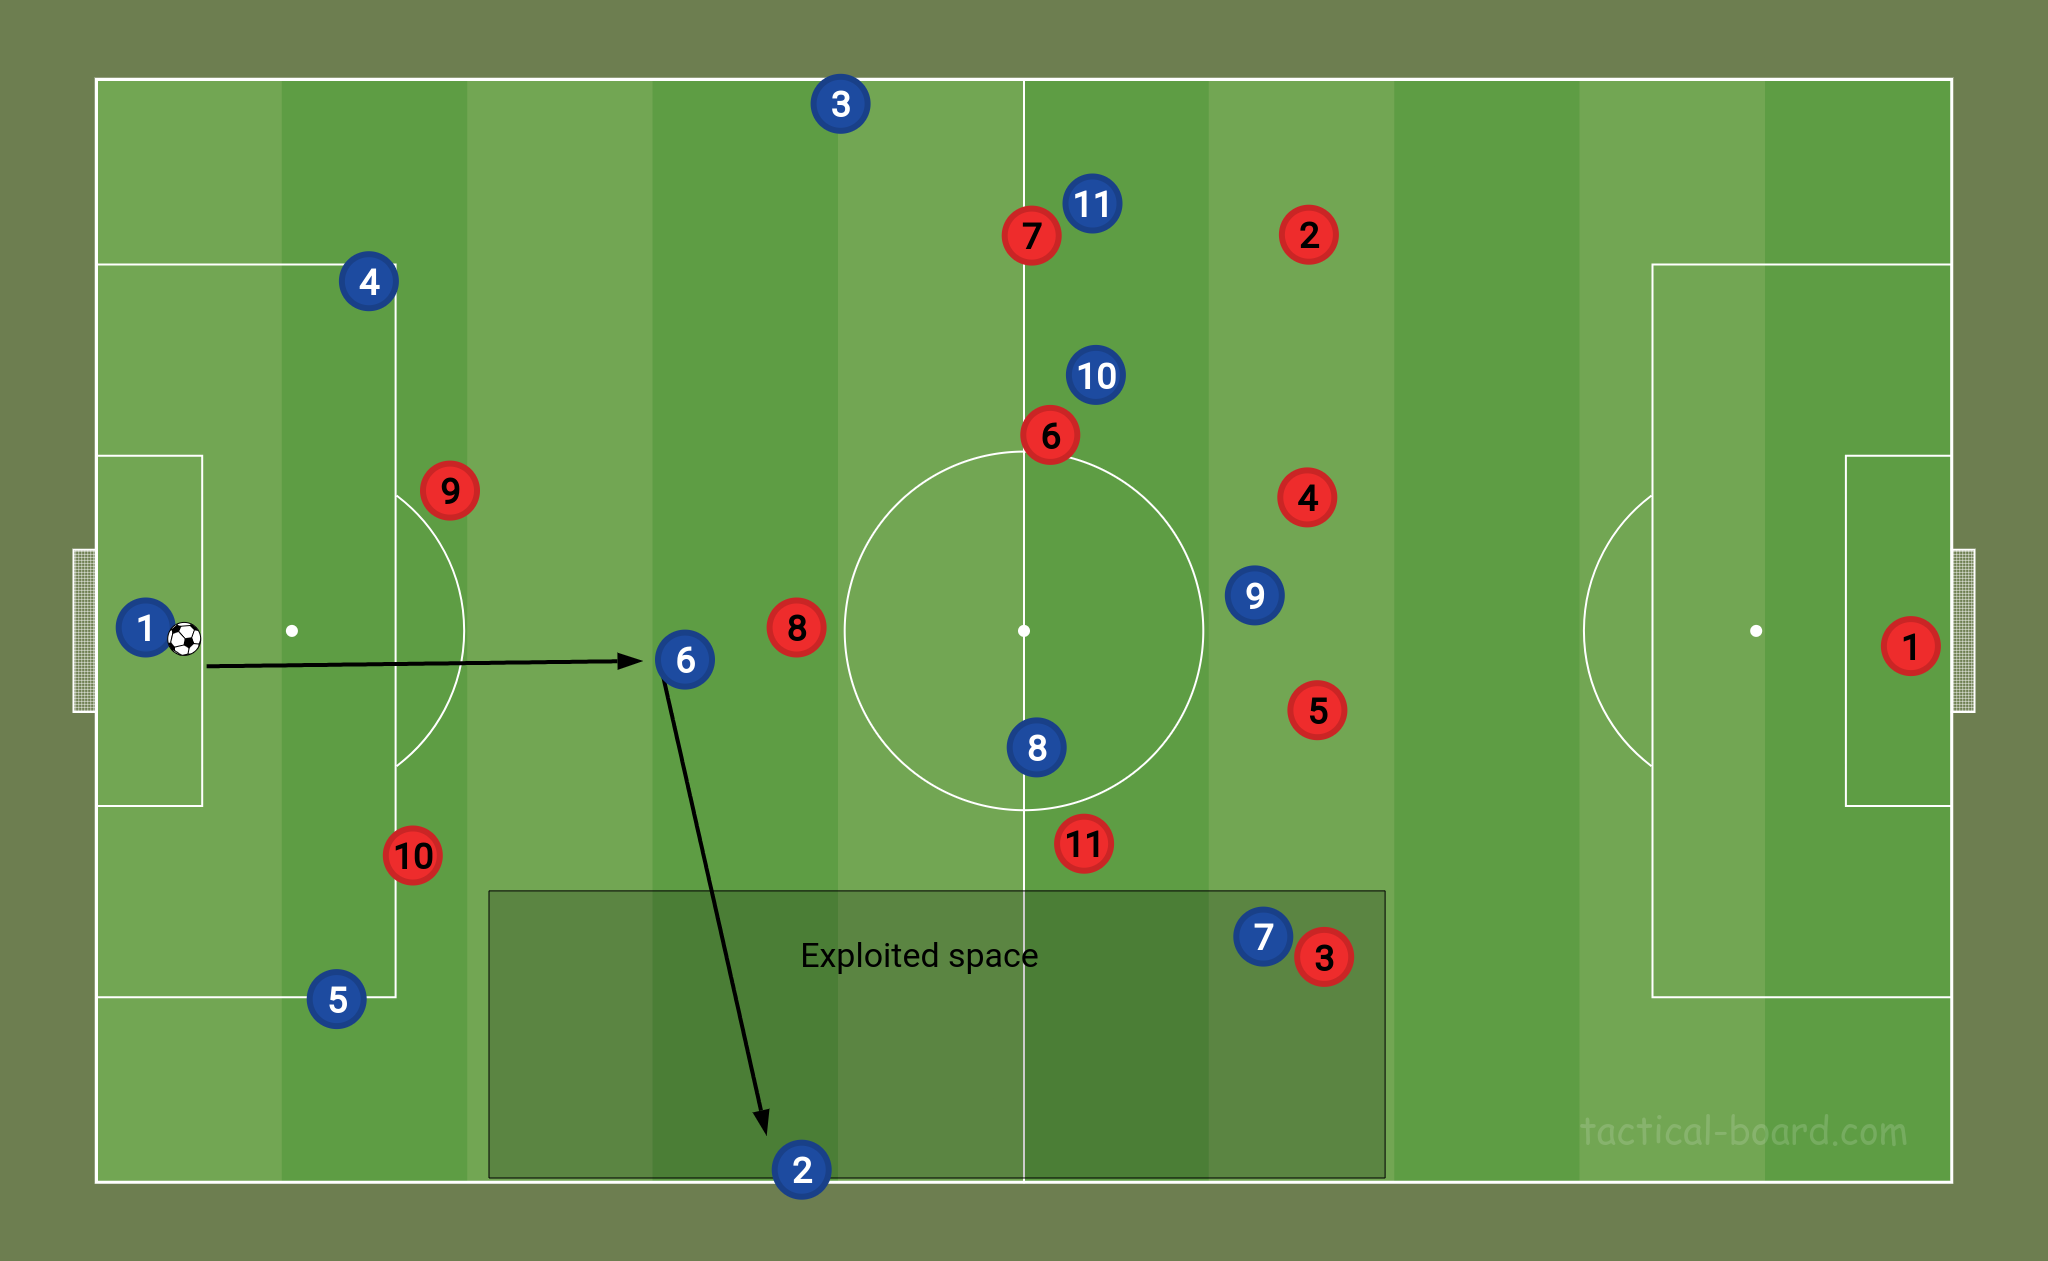
The other thing that can happen is that opposition’s wide midfielder player (in diagram III LM (#11)) will move towards inside. In this situation, our RW (#7) can pin opposition’s LB (#3) and with fast circulation we can exploit the space created for our RB (#2).
 Diagram III: Opposition’s LM (#11) moved inside which triggers our RW (#7) to pin opposition’s LB (#3). This combination of events opened space on the wing for our RB (#2).